
how to clean stainless steel sinks comes down to two things most people miss: cleaning with the grain and using the right level of “gentle” for the mess you have, not the mess you wish you had.
If your sink looks dull five minutes after you wipe it, you’re not alone, hard water, greasy cooking residue, and the wrong cloth can leave haze, streaks, or tiny scratches that catch grime. The good news is stainless steel is forgiving when you treat it consistently.
This guide walks you through a quick daily reset, deeper weekly clean, and targeted fixes for common stains like water spots, rust marks, and discoloration, plus what not to do if you want to keep the finish looking smooth.
What makes stainless steel sinks look dirty (even when they’re “clean”)
Stainless steel rarely “stains” the way porous materials do, it just shows evidence. The main culprits tend to be surface buildup and light damage that changes how light reflects.
- Hard-water minerals: calcium and magnesium dry into white spots and chalky film.
- Soap + grease combo: dish soap can mix with cooking oils and leave a dull haze.
- Abrasive habits: scouring powders, rough sponges, and wiping against the grain create micro-scratches that hold residue.
- Chloride exposure: bleach or some cleaners can trigger pitting in stainless over time, especially if left sitting.
According to the American Cleaning Institute (ACI), it’s smart to follow product label directions and avoid mixing cleaners, especially when bleach is involved, because unsafe fumes can occur. In practice, “don’t mix” also keeps your sink finish safer.
A quick self-check: pick the right cleaning level
Before you grab a random spray, match the approach to what you see. This saves time and prevents over-scrubbing.
- Just used, looks fine: quick rinse + wipe + dry.
- Looks dull or streaky: mild soap + microfiber, then a vinegar rinse if needed.
- White spots or chalky rings: vinegar soak or vinegar compress, then rinse well.
- Brown/orange specks: treat like surface rust contamination, gentle oxalic-acid cleaner or stainless-safe rust remover.
- Rainbow/heat tint: mild acid cleaner and time, not brute force.
If the sink has a protective coating from the manufacturer, the gentlest route usually wins, when in doubt, test any method on a small corner first.
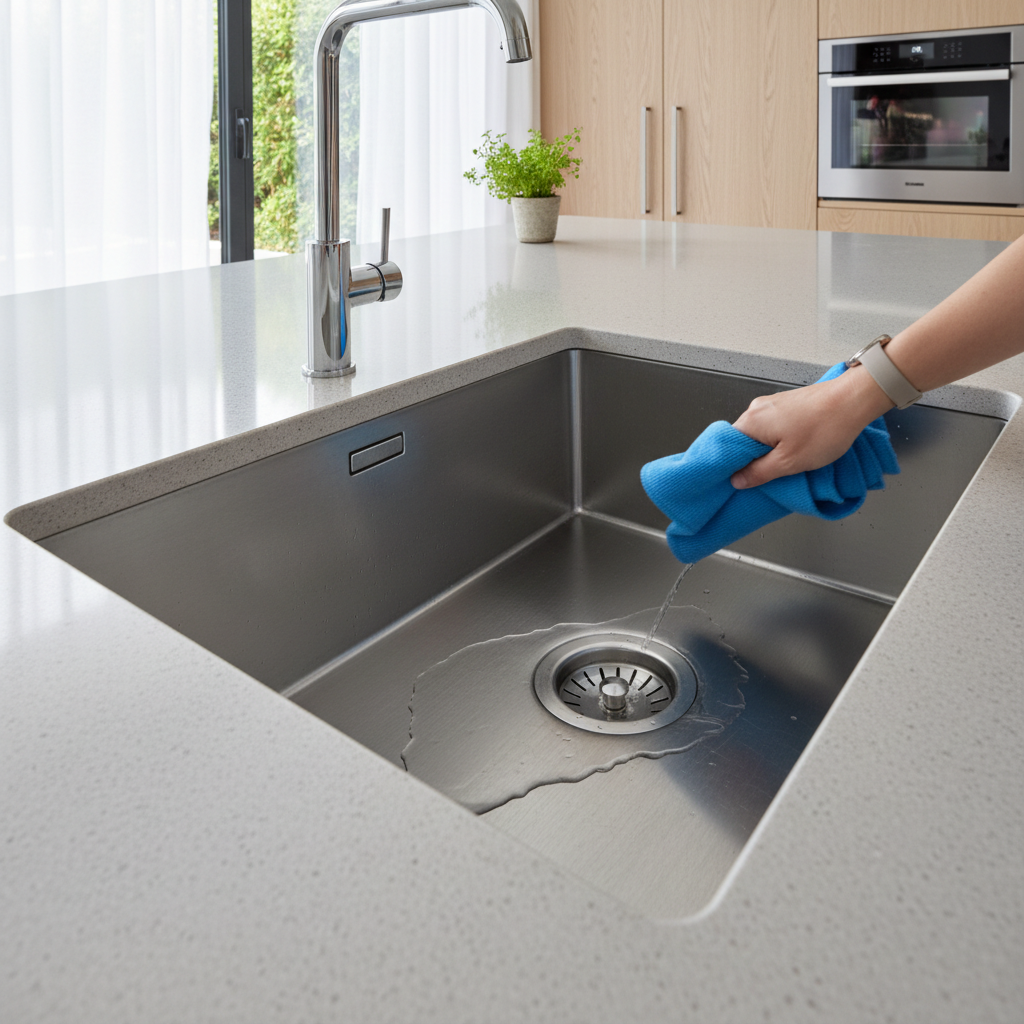
The everyday method (5 minutes, no drama)
This is the routine most likely to keep you from needing “rescue” cleaning later. It’s also the simplest answer to how to clean stainless steel sinks without chasing streaks.
What you need
- Warm water
- Mild dish soap
- Microfiber cloth or a non-scratch sponge
- Dry towel (microfiber works best)
Steps
- Rinse out food bits and grit, small particles can act like sandpaper.
- Add a drop or two of dish soap to a wet cloth, wipe with the grain (you’ll see faint lines in the steel).
- Rinse thoroughly so soap doesn’t dry into haze.
- Dry immediately, this single step prevents most water spots.
That drying step feels optional until you see how much nicer the finish looks when water doesn’t get a chance to evaporate on the surface.
Weekly deep clean for shine (and fewer water spots)
If your sink looks “gray” even after daily wiping, a weekly reset removes the thin film that builds up from soap, grease, and minerals.
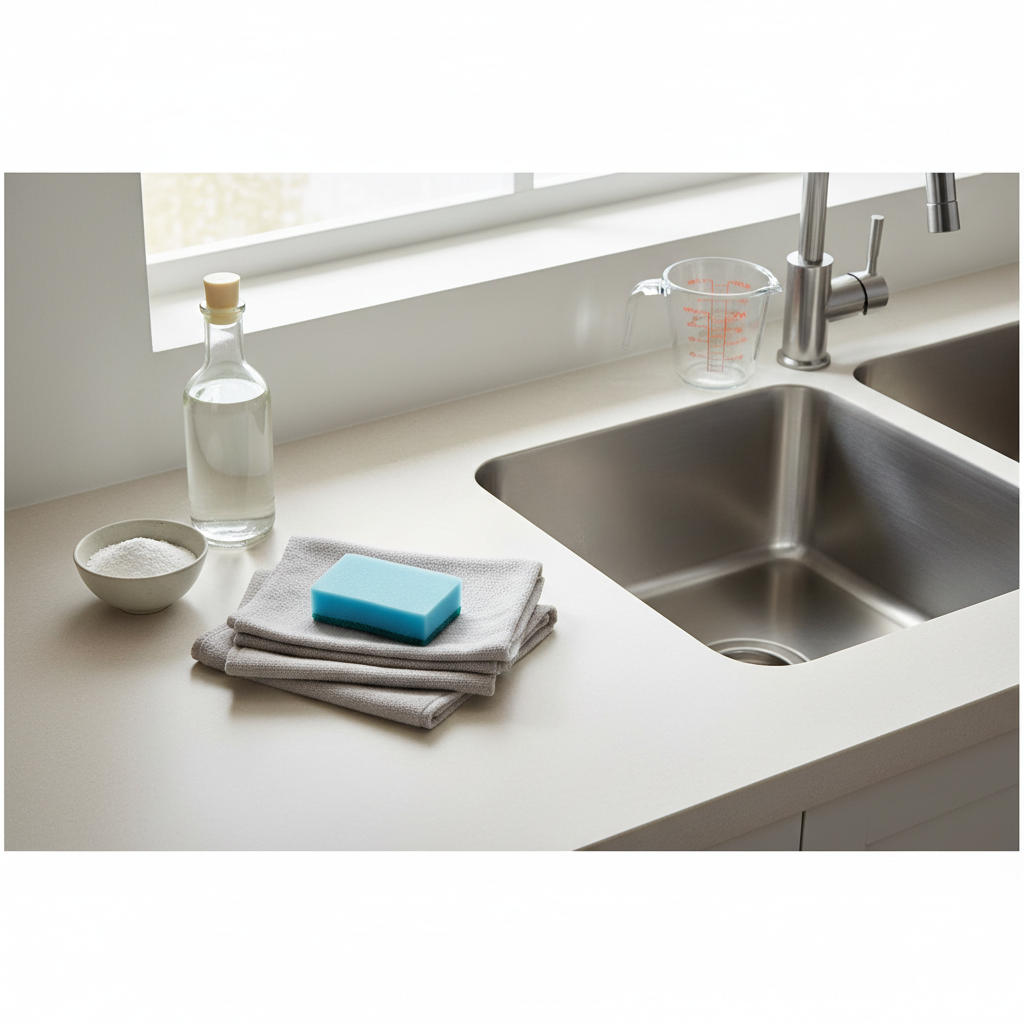
Option A: baking soda paste (good for general grime)
- Sprinkle baking soda over a wet sink, or mix a loose paste with water.
- Gently rub with a soft cloth along the grain, don’t bear down.
- Rinse very well, leftover powder can look like scratches when it dries.
- Dry the sink, then buff with a clean microfiber cloth.
Option B: vinegar rinse (good for mineral film)
- Spray or wipe white vinegar over the surface.
- Let it sit 1–3 minutes, then wipe with the grain.
- Rinse fully and dry.
Small caution: if you use vinegar, don’t let it sit for a long time, especially around seams or accessories, and avoid it on nearby natural stone counters because it can etch them.
Targeted fixes: stains and issues you’ll actually run into
Different “stains” are different problems, treating them the same way is how people end up scrubbing too hard.
Hard-water spots and rings
- Soak a paper towel in vinegar, lay it over the spot for a few minutes.
- Wipe gently with the grain, rinse, dry.
- If spots return fast, consider drying after each use as your main fix.
Greasy haze that won’t rinse off
- Use a bit more dish soap and hotter water, wipe twice if needed.
- Follow with a vinegar wipe to cut leftover film, then rinse and dry.
Rust-colored specks (often contamination, not the sink “rusting”)
Those orange dots often come from steel wool particles, cast-iron pans, or metal tools left in the basin. For many sinks, a stainless-safe cleanser that contains oxalic acid can help, but follow the label carefully.
- Try baking soda first for mild specks.
- If needed, use a stainless steel cleaner labeled for rust stains, test a small area.
- Rinse thoroughly and dry.
Rainbow discoloration or heat tint
This can happen from hot cookware or certain water chemistry. Gentle acid cleaners sometimes reduce it, but it may not disappear completely. If it keeps coming back quickly, water quality may be part of the story.
Product cheat sheet: what to use, what to skip
Here’s a practical table for choosing cleaners without overthinking it.
| Situation | Use | Avoid |
|---|---|---|
| Daily cleanup | Mild dish soap, warm water, microfiber | Rough scrub pads, steel wool |
| Water spots / mineral film | White vinegar (short contact), then rinse | Long vinegar soaks near stone or seals |
| Dull finish / soap haze | Baking soda paste, gentle rubbing | Abrasive powders used aggressively |
| Rust specks | Stainless-safe rust remover (labelled), spot treatment | Bleach left sitting, steel wool scrubbing |
| Disinfecting needs | EPA-registered kitchen disinfectant used as directed | Mixing disinfectants, “DIY chemistry” |
According to the U.S. Environmental Protection Agency (EPA), disinfectants should be used according to label directions, including required contact time. For most households, cleaning first, then disinfecting only when you need it, is more realistic than trying to disinfect every time you do dishes.
Common mistakes that cause scratches and streaks
- Scrubbing against the grain: it can make the finish look patchy, even if it’s technically clean.
- Letting cleaner air-dry: many products leave residue that looks like “stains.”
- Using chlorine bleach regularly: it may contribute to pitting and dullness if misused or left on too long.
- Steel wool shortcuts: it can shed particles that later show up as rust specks.
- Skipping the dry towel: the fastest route to recurring spots, especially in hard-water areas.
If you want one habit change, make it this: rinse well and dry, it’s boring but it works.
When it’s time to call a pro (or check the manufacturer)
Most sink issues are cosmetic, but a few deserve more caution.
- Deep scratches you can feel: refinishing may be possible, but results vary by finish type.
- Pitting (tiny holes) or flaking: could be chemical damage, check warranty guidance before experimenting.
- Persistent rust that returns quickly: may indicate contamination sources or water quality issues, a plumber or water specialist might help.
- Unusual odors from the drain: that’s usually a drain-cleaning topic rather than a sink-surface issue, if you suspect a plumbing problem, a professional opinion is safer.

Key takeaways and a simple routine to stick with
If you’ve been bouncing between random sprays and heavy scrubbing, you can simplify. how to clean stainless steel sinks is mostly about gentle friction, short dwell time for acids, and drying so minerals don’t get a free pass.
- After use: rinse, soap wipe, rinse, dry.
- Weekly: baking soda scrub or quick vinegar wipe, then dry and buff.
- As needed: spot-treat rust specks and mineral rings, avoid harsh tools.
Pick one microfiber cloth that “belongs” to the sink area, and keep vinegar and baking soda within reach, that alone usually reduces the urge to reach for abrasive options.
If you want to make this easier, set a reminder for a 7-minute weekly reset, and commit to drying the sink at night for two weeks, you’ll know quickly whether water spots are your main issue.