
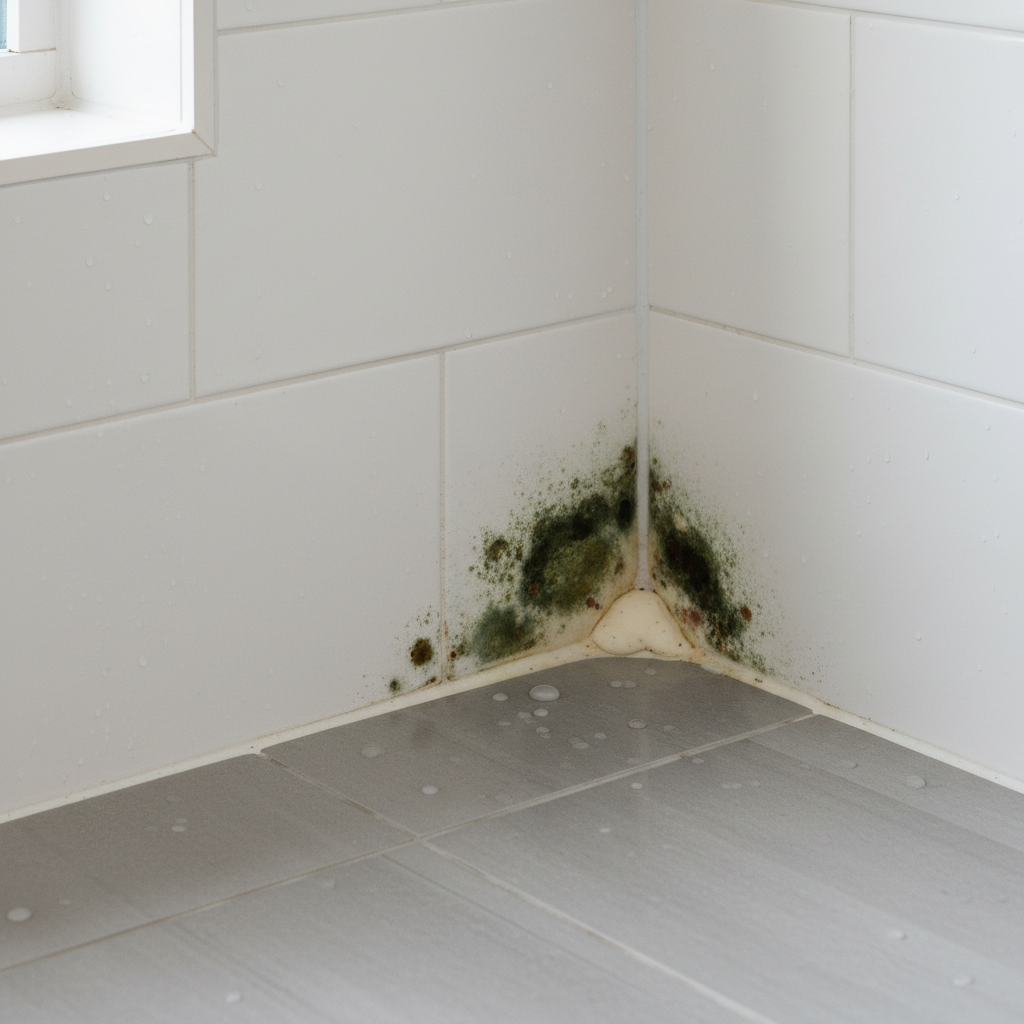
How to get rid of mold in bathroom corners usually comes down to two things: removing what you can see, and fixing the moisture pattern that keeps feeding it. If you only scrub the stain, it often comes back in the same spot within weeks.
Bathroom corners are a perfect trap, steam rises, cool surfaces condense, and tight seams hold water longer than you think. Add a slow fan, a leaky fixture, or old caulk, and mold has a reliable “water schedule.”
This guide stays practical: how to tell whether you are dealing with surface mold or something deeper, what cleaners tend to work on grout and caulk, and what prevention steps matter most in real bathrooms. I’ll also flag the moments where it makes sense to stop DIY and call a professional, especially if anyone at home has asthma or sensitivities.
Why mold keeps showing up in bathroom corners
Most households blame “not cleaning enough,” but corners grow mold because they stay damp longer than the rest of the shower. That extra drying time is the whole game.
- Slow drying surfaces: corners have less airflow, more shadow, and more seams, so they dry last.
- Failing caulk or grout: tiny gaps hold water, soap film, and skin oils, which mold can feed on.
- Ventilation that looks fine but isn’t: a fan that runs but doesn’t vent outdoors, or isn’t powerful enough for the room, often leaves humidity behind.
- Hidden moisture: a small leak behind tile, a loose shower door track, or water wicking under silicone can keep the area damp 24/7.
According to the U.S. Environmental Protection Agency (EPA), controlling moisture is the key step for preventing mold growth, which is why prevention work usually matters as much as the cleaning itself.
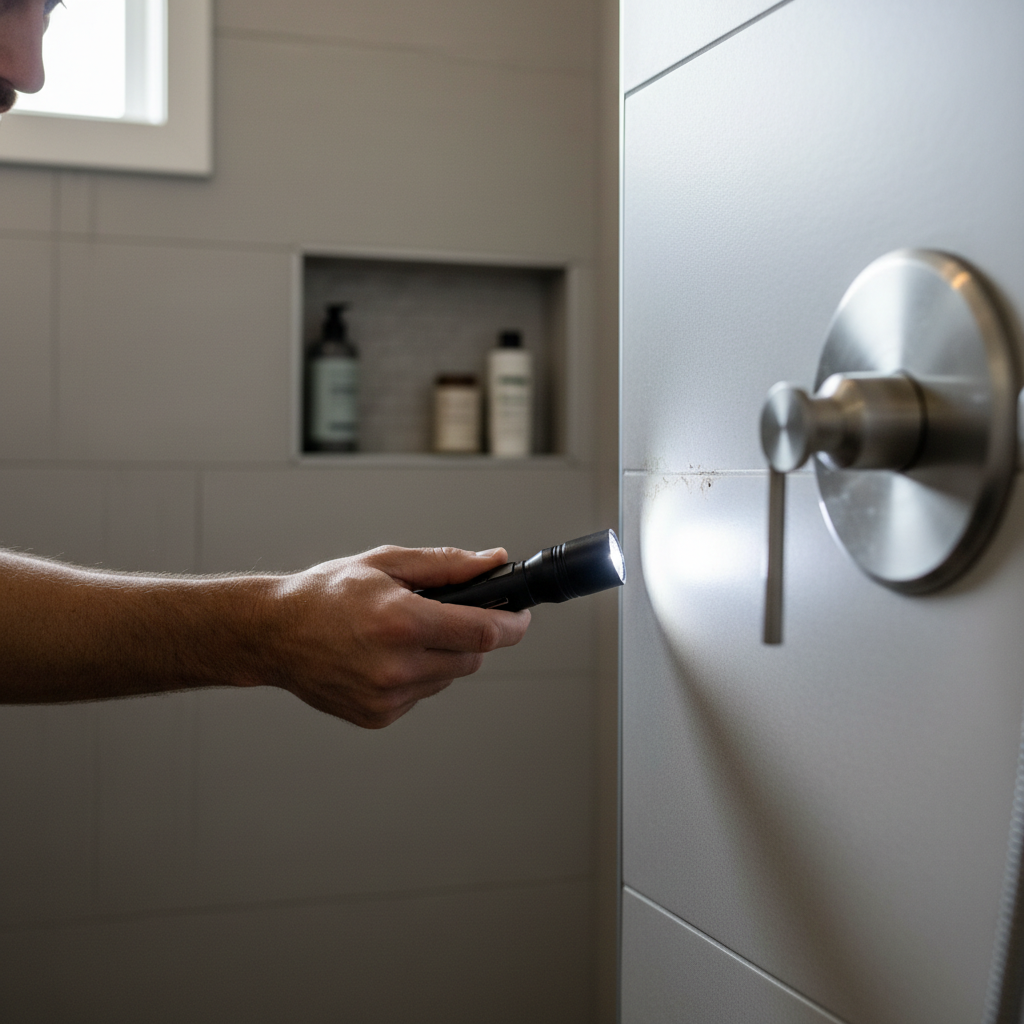
Quick self-check: is it surface mold, stained grout, or a bigger problem?
Before you pick a product, figure out what you’re looking at. The same “black line” can be living mold, old staining, or moisture damage.
- Wipes off slimy or smears: often surface growth on soap film, common on caulk and glossy tile.
- Doesn’t wipe off but lightens with cleaner: often mold embedded in porous grout, or mildew staining.
- Soft, crumbling caulk: caulk failure, cleaning helps temporarily but replacement is the real fix.
- Paint bubbling, wall feels “spongy,” or a musty smell outside the shower: possible hidden moisture, consider professional evaluation.
- Area grows back in days: moisture source likely active, leak or constant condensation.
Key point: if you suspect hidden water behind tile or drywall, heavy-duty cleaners won’t solve the root issue, and you can waste a lot of effort scrubbing a symptom.
What to use (and what to avoid) for bathroom corner mold
For most bathrooms, you want something that both removes the organic grime layer and disinfects. The right pick depends on whether the mold is on tile, grout, or silicone caulk.
Common options and where they fit best
| Cleaner type | Best for | Upside | Watch-outs |
|---|---|---|---|
| Dish soap + warm water | Soap film, light surface growth | Gentle, good first pass | May not kill spores; still needs drying |
| Hydrogen peroxide (3%) | Grout, tile corners | Often effective on porous grout | Spot test; can lighten some materials |
| Bleach solution (diluted) | Non-porous tile surfaces | Can disinfect and brighten | Ventilation needed; not ideal for porous grout; never mix with ammonia or acids |
| Commercial mold remover (bathroom labeled) | Caulk lines, grout, corners | Convenient, targeted formulas | Follow label; some are harsh on finishes |
| Vinegar | Light mildew on tile | Easy, accessible | May be too mild for deep grout/caulk issues; avoid some natural stones |
According to the Centers for Disease Control and Prevention (CDC), you should avoid mixing cleaning products, because dangerous gases can form. If you use bleach, keep it solo, rinse thoroughly, and ventilate well.
Step-by-step: how to clean mold out of bathroom corners safely
If your goal is how to get rid of mold in bathroom corners without turning the bathroom into a chemistry lab, keep it simple and controlled. The big mistake is switching products mid-way or scrubbing before removing the greasy film.
1) Prep the area (2 minutes that save you 20)
- Turn on the exhaust fan and crack a window if possible.
- Wear gloves, and consider eye protection; if you’re sensitive, a well-fitted mask can help.
- Remove bottles, mats, and anything that blocks the corner, mold hides under clutter.
2) Remove soap scum first
- Wash the corner with dish soap and warm water, then rinse.
- Dry with a towel, this helps the next product actually contact the mold rather than floating on a wet layer.
3) Apply your mold-killing product and wait
- Spray or apply peroxide or a bathroom mold remover, aiming into the seam where tile meets caulk.
- Let it dwell per label guidance, rushing this step usually leads to “it didn’t work.”
4) Scrub with the right tool
- Use a small grout brush or an old toothbrush for corners.
- For caulk lines, scrub gently, aggressive scraping can tear silicone and create more gaps.
5) Rinse, dry, then inspect
- Rinse thoroughly and wipe dry.
- If staining remains but the surface is clean, you may be seeing discoloration rather than active growth.
Safety note: if you feel chest tightness, wheezing, or irritation during cleaning, stop and get fresh air. In households with respiratory conditions, it may be wiser to consult a professional early.
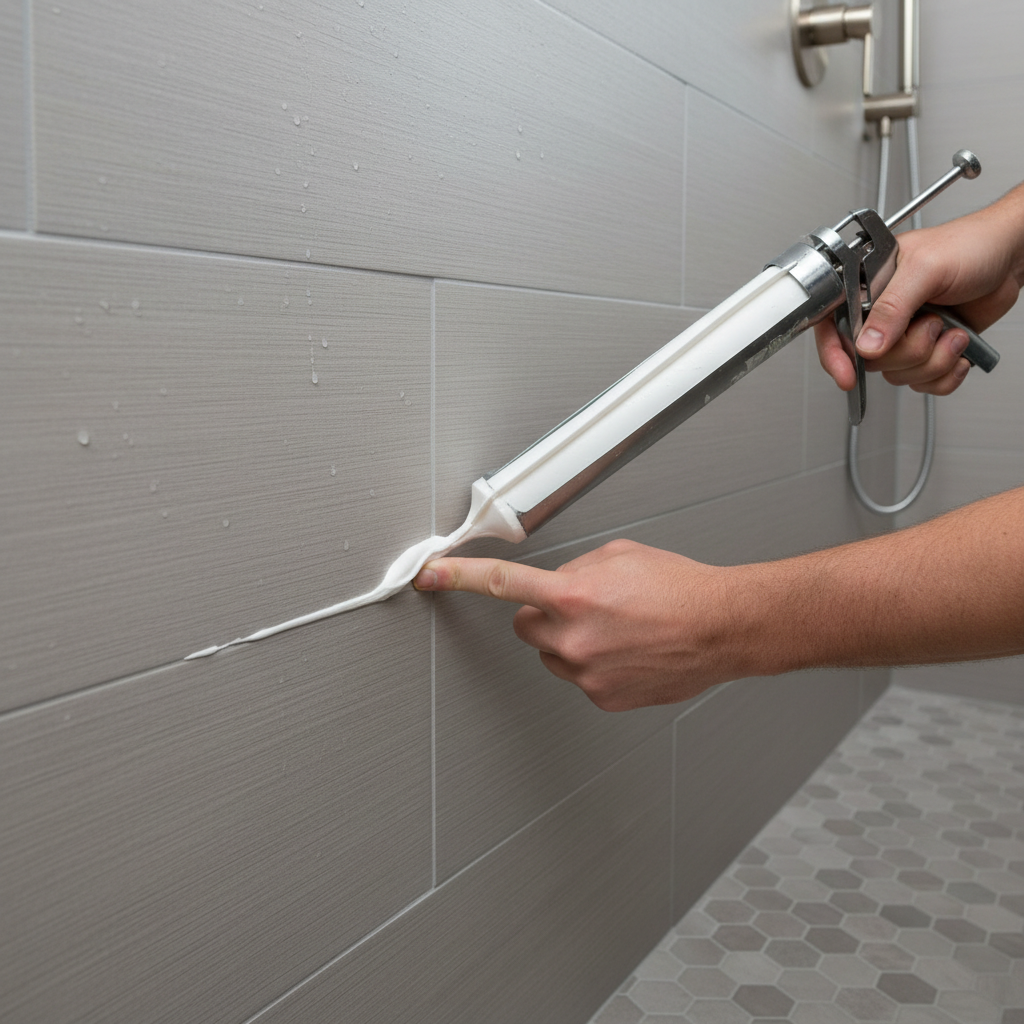
When cleaning isn’t enough: re-caulking and grout touch-ups
Here’s the part many DIY guides skip: if mold lives inside cracked caulk, no spray will “reach” it reliably. You can lighten the surface, but the dark line tends to return.
Signs it’s time to replace caulk
- Caulk is peeling, split, or pulling away at the corner.
- Black spotting reappears quickly after cleaning and drying.
- Water seeps behind the seam when you shower.
Basic re-caulking outline
- Remove old silicone completely with a caulk remover tool and residue remover.
- Clean and dry the seam fully, moisture trapped under new silicone is a common failure point.
- Apply bathroom-rated, mold-resistant silicone in a continuous bead, then tool it smooth.
- Let it cure per label before exposing to water.
If grout is cracked or missing, patching small areas with grout repair can reduce water entry. Larger failures may need re-grouting, which is more involved and sometimes worth hiring out.
Prevention that actually keeps corners clean (most of the time)
After you’ve done the work, prevention is what makes how to get rid of mold in bathroom corners a one-time project instead of a monthly chore. You don’t need perfection, you need consistency.
Daily or after-shower habits
- Squeegee or towel-dry corners: 30 seconds makes a noticeable difference in many bathrooms.
- Run the fan long enough to clear humidity, not just during the shower.
- Leave the shower door or curtain open a bit so moisture escapes.
Weekly habits
- Quick-clean corners to remove the “food” layer: soap scum and oils.
- Check for early spotting, catching it early avoids harsh chemicals later.
Home setup improvements
- Confirm the fan vents outdoors and the grille is clean.
- If the bathroom stays humid, a small dehumidifier can help, especially in older homes.
- Fix drips and slow leaks fast, even a small valve seep can keep a corner damp.
Key takeaways:
- Dry time is the deciding factor for whether mold returns.
- Caulk condition matters, bad caulk often means repeated regrowth.
- Ventilation beats stronger chemicals in the long run.
Common mistakes that make mold come back
Most repeat problems come from a few predictable missteps, not from choosing the “wrong” brand of cleaner.
- Scrubbing without degreasing first: soap film blocks disinfectants from contacting the surface.
- Overusing bleach on porous grout: it can whiten, but may not penetrate where moisture lives, results vary by material.
- Not letting products dwell: quick spray-and-wipe rarely works on corners.
- Sealing in moisture: recaulked seams over damp surfaces often fail early.
- Ignoring the fan: if the room stays humid, cleaning becomes a loop.
When to call a pro (and what to ask)
DIY cleaning is reasonable for small, visible patches, but there are times when it’s smarter to get help. According to the EPA, mold problems caused by contaminated water or extensive growth may require professional remediation, and people with health concerns should be cautious.
- Growth covers a large area, or keeps spreading beyond corners.
- You suspect water damage behind walls, flooring, or under a shower pan.
- There’s a persistent musty odor outside the bathroom.
- Someone in the home has asthma, allergies, or is immunocompromised, extra caution is wise, and a professional opinion may be safer.
When you call, ask how they plan to identify the moisture source, how they contain dust and debris, and whether repairs like sealing or ventilation upgrades are part of the scope, not just surface cleaning.
Conclusion: a clean corner is mostly a dry corner
How to get rid of mold in bathroom corners is very doable when you treat it like a moisture problem first and a cleaning problem second. Clean the film, use a product that matches the surface, and if caulk is failing, replace it instead of fighting it.
If you want one next step that pays off fast, run your fan longer and towel-dry the corners for a week, then see whether spotting slows down. If it doesn’t, that’s your signal to inspect caulk, grout, and potential leaks more seriously.
FAQ
How do I get rid of mold in bathroom corners without bleach?
You can often use 3% hydrogen peroxide or a bathroom mold remover that isn’t bleach-based. Start by removing soap scum, then apply, let it dwell, scrub, rinse, and dry; results depend on whether mold is on the surface or inside old caulk.
Why does mold keep coming back in the same shower corner?
Usually that corner stays wet longer due to airflow and seams, or the caulk/grout has small failures that hold water. If regrowth happens quickly, look for hidden moisture like a slow leak or water wicking under silicone.
Can I just paint over mold in a bathroom corner outside the shower?
Painting over it rarely holds up unless the area is cleaned and dried and the moisture cause is fixed. If paint is bubbling or the wall feels soft, you may be dealing with water intrusion, which is a good time to ask a professional.
Is black mold in the shower corners always “toxic black mold”?
No, color alone doesn’t confirm a specific species. Because health risk varies by person and situation, it’s reasonable to treat any visible mold as something to remove safely, and consult a professional if symptoms or extensive growth are involved.
What’s the fastest way to clean mold out of caulk?
Fastest short-term is a targeted bathroom mold remover with enough dwell time, but if caulk is degraded, replacement tends to be the lasting fix. If you can peel or split it with a fingernail, cleaning won’t buy you much time.
Should I seal grout after removing mold?
In many cases, grout sealing helps reduce water absorption and staining, but it won’t compensate for cracks or missing grout. Let the area dry fully, then follow the sealer label directions and reapply as needed.
How long should I run the bathroom fan to prevent mold?
Long enough to clear lingering humidity, which varies by bathroom size, fan strength, and how hot your showers run. A practical test is whether mirrors and corners dry quickly; if not, extend run time or improve ventilation.
If you’re dealing with repeated corner mold even after cleaning, you may save time by treating it as a small “system” problem: moisture source, airflow, and the condition of caulk and grout. If you’d rather not troubleshoot each variable, a quick inspection from a qualified bathroom contractor or mold remediation pro can clarify whether it’s a simple reseal job or something deeper.